
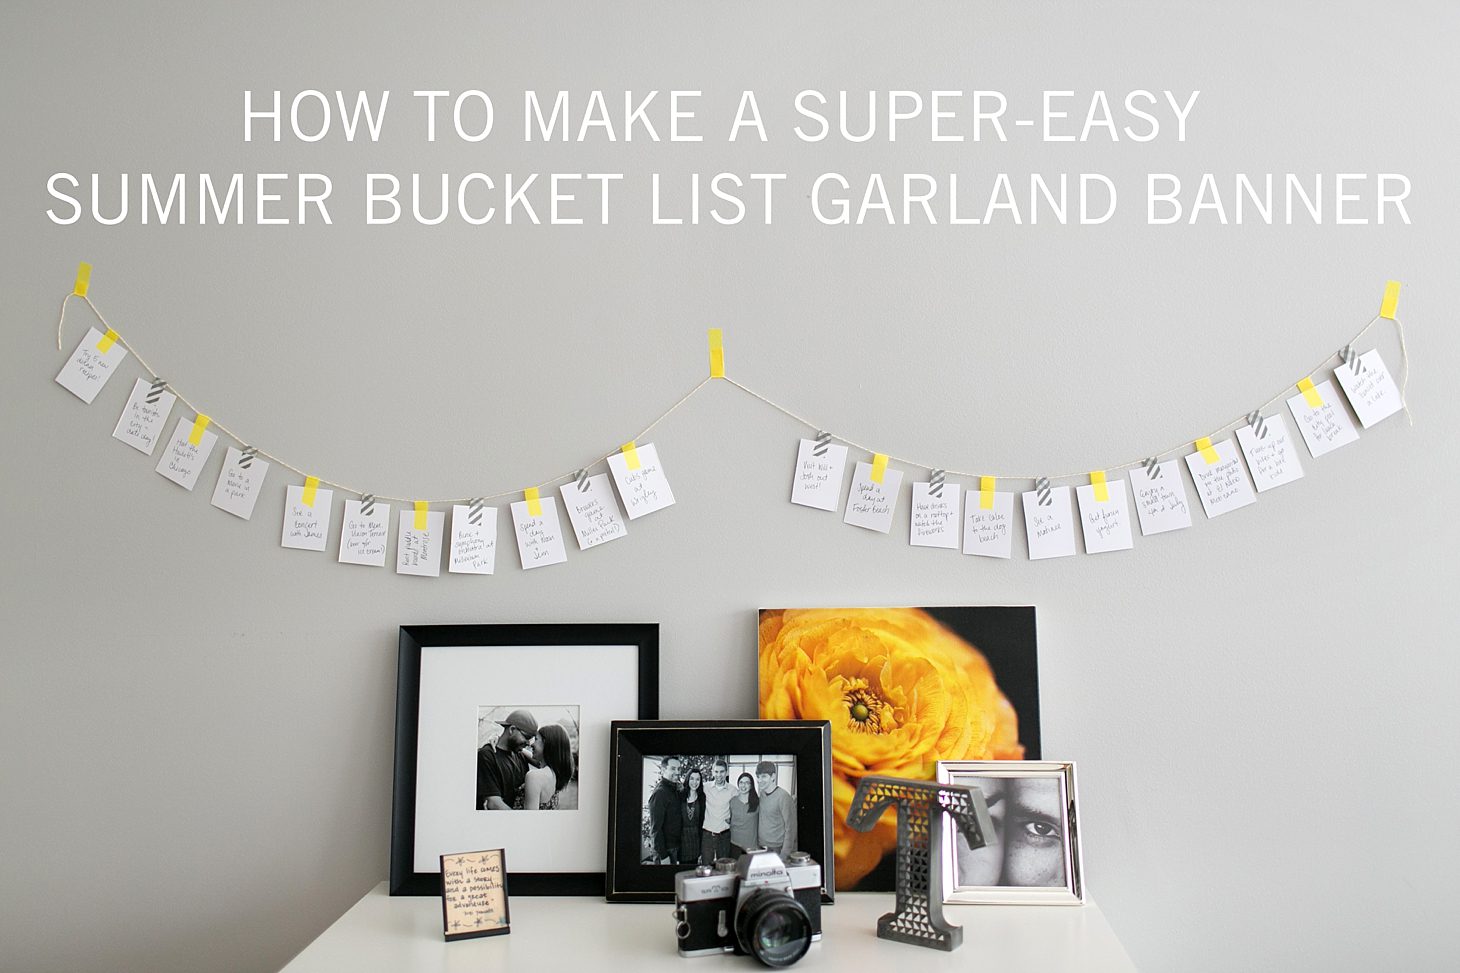
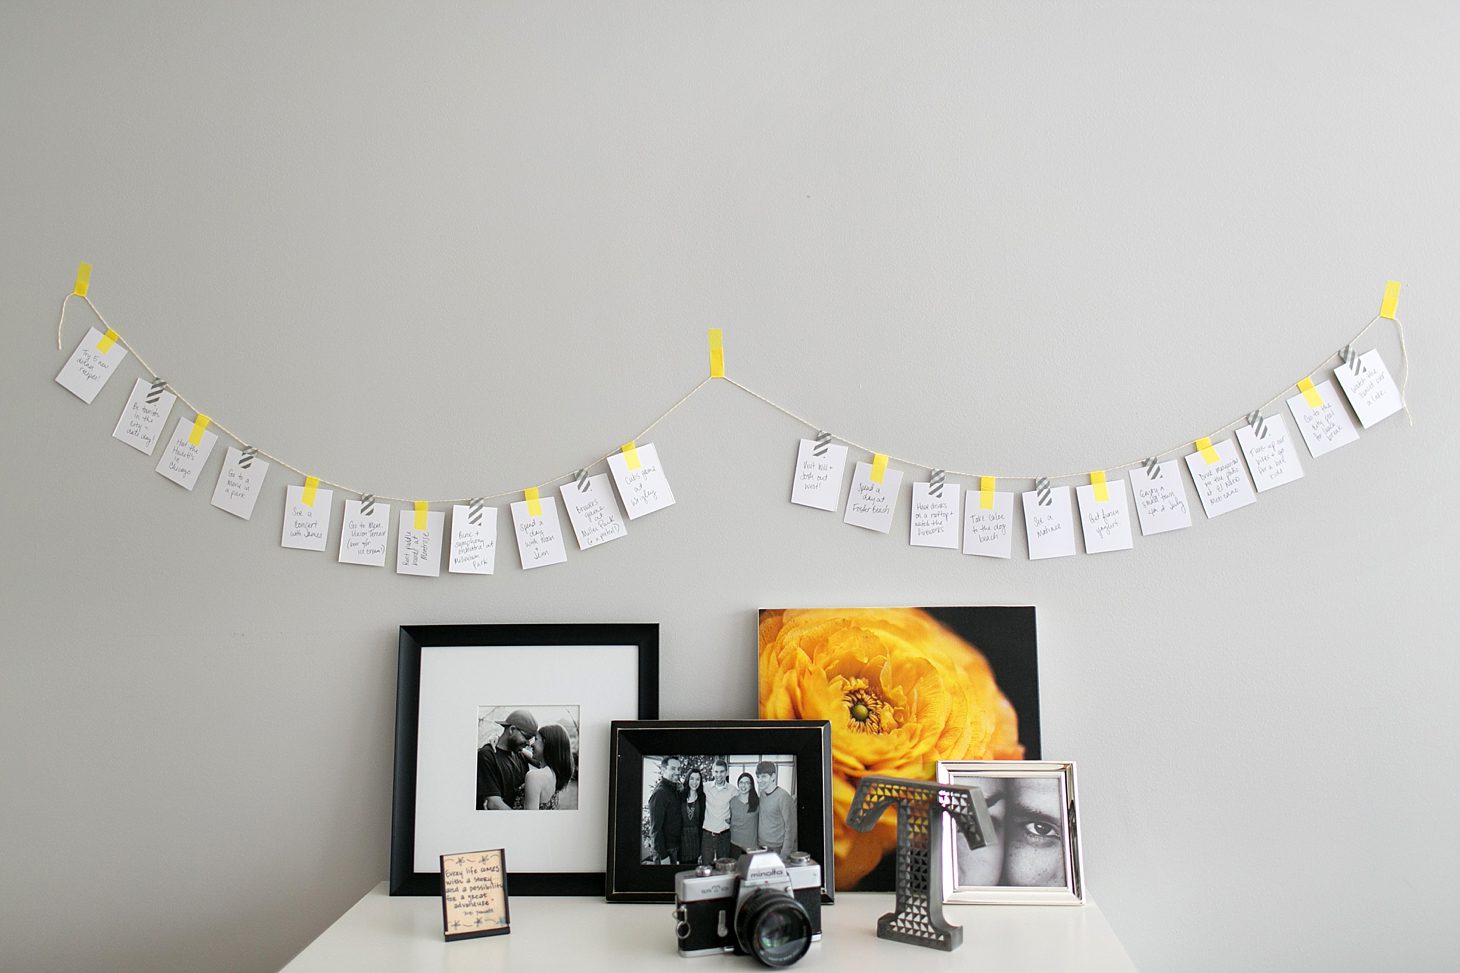
I had a few people write me after yesterday’s Summer Bucket List post asking how I went about making the garland banner that we’re using as a visual reminder of our list (that I posted on Instagram here)! It was super easy to do with some things I already had on hand – so I wanted to share!!
All you need is:
- Notecards (or any old paper you have sitting around! I used old thank you cards from my business that I no longer use since we rebranded)
- Washi Tape
- Baker’s Twine
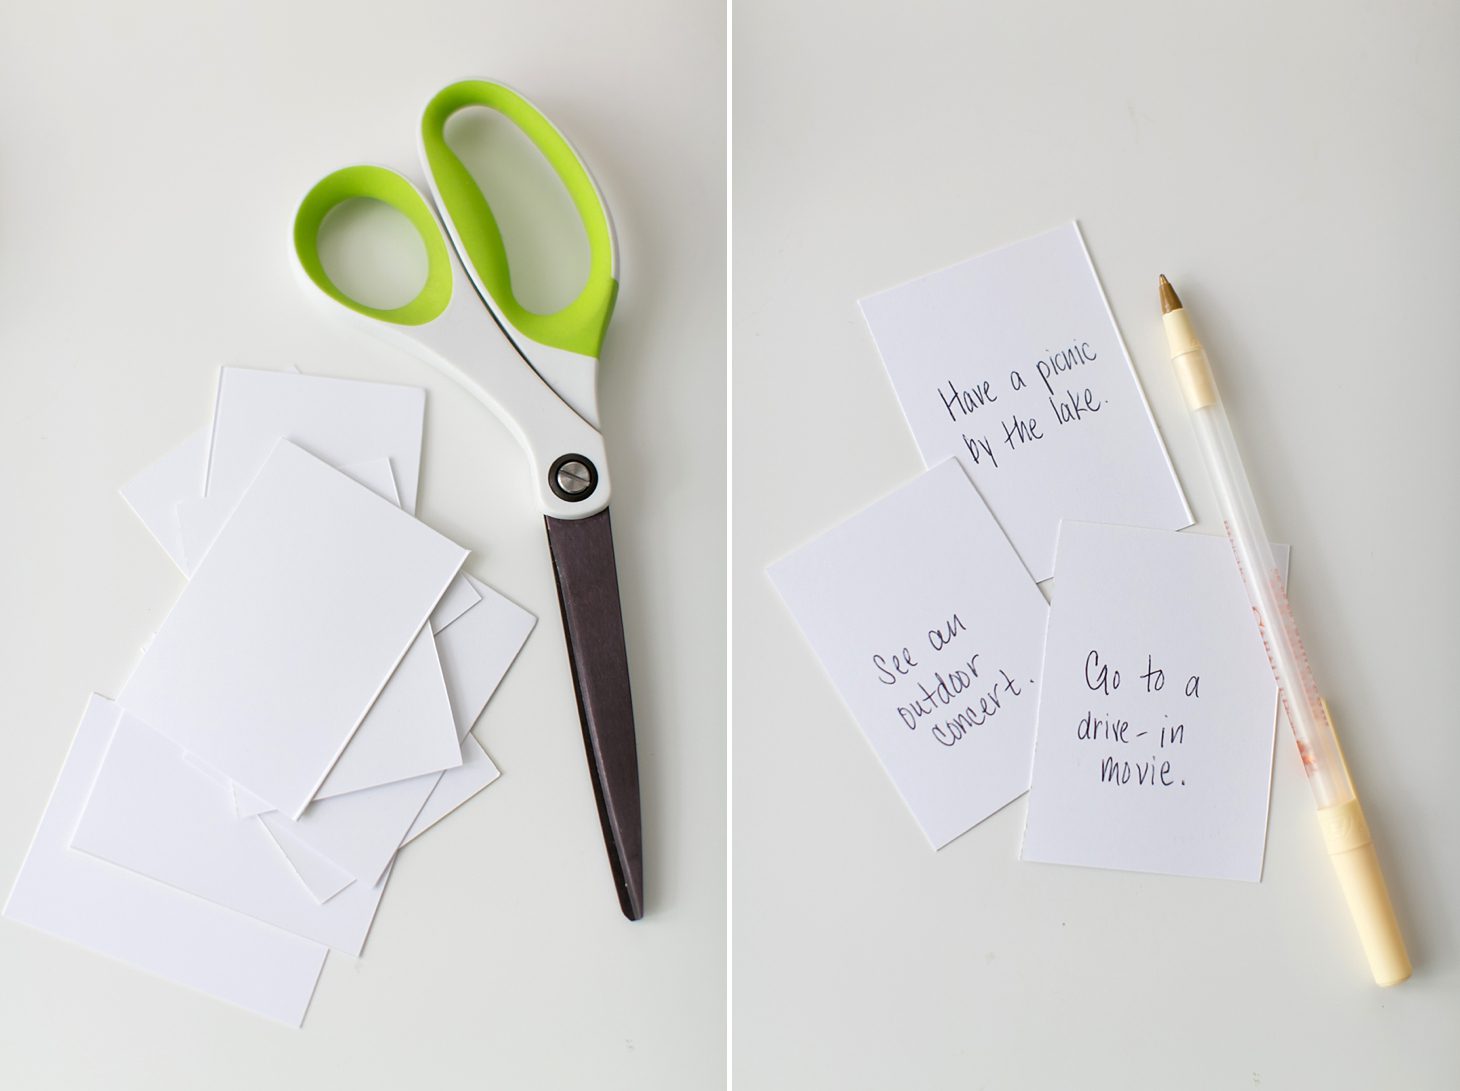
- Scissors & Pen or Marker

Like I said, I happened to have this sitting around back from the yellow & gray branding days of our business – so I used what I already had! I know you can also find these things at Container Store if you want to go to a store for them, or lots of shops on Etsy! I got mine at InkScissorsPaper.com – where they have a ton of options if you want to be picky about your colors!
First, write your summer bucket list!
Next, cut your notecards into small rectangles, and write each item from your summer bucket list on one piece of paper, leaving a little space at the top where the tape will fold over. (I got 8 little cards per notecard so it took me a few notecards to make enough for our entire list.)
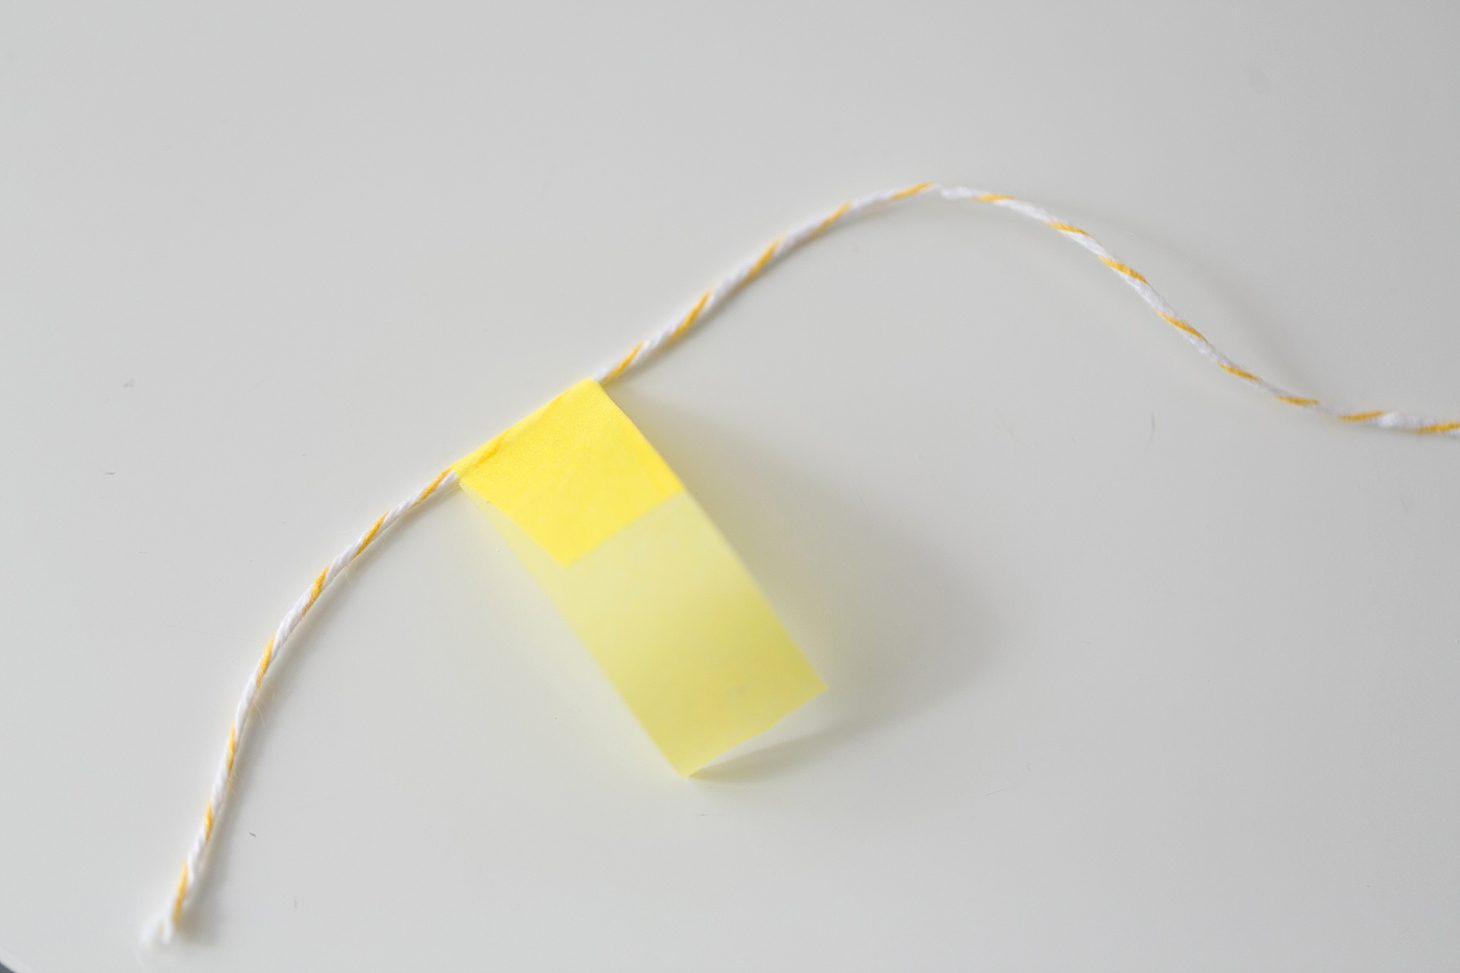
Unravel some of the baker’s twine and start with the loose string on the left. Fold a piece of washi tape over a few inches from the end of the string, leaving about an inch on one side of the tape to stick to the wall.
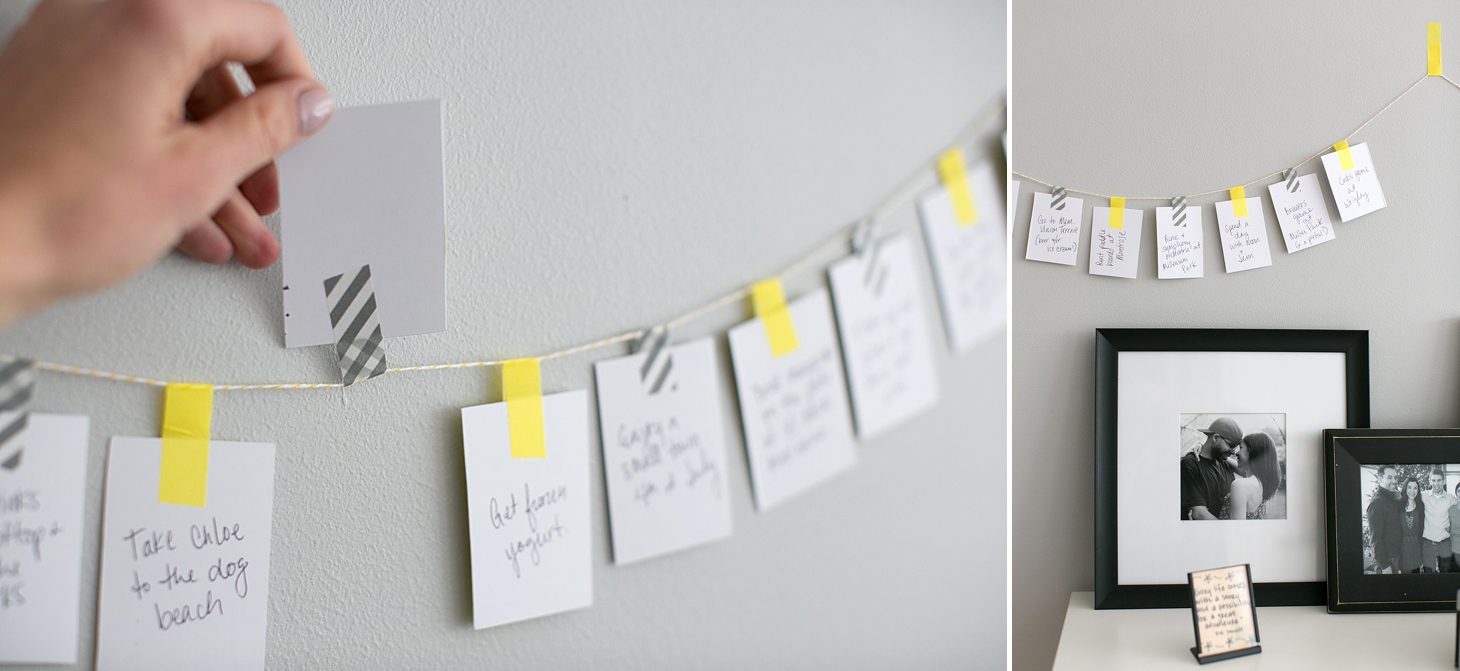
Lay out your pieces of paper along the length of the string, leaving a little space between each note. (I had 22 things on our bucket list, so I did 11 notes in a row, then left space in the middle for another piece of washi tape to stick to the wall, and then did 11 more notes. You could do more dips in the garland if you wanted to – just split your notes into 3 groups instead, and leave two spaces for tape between the groupings to make more dips in the garland.)
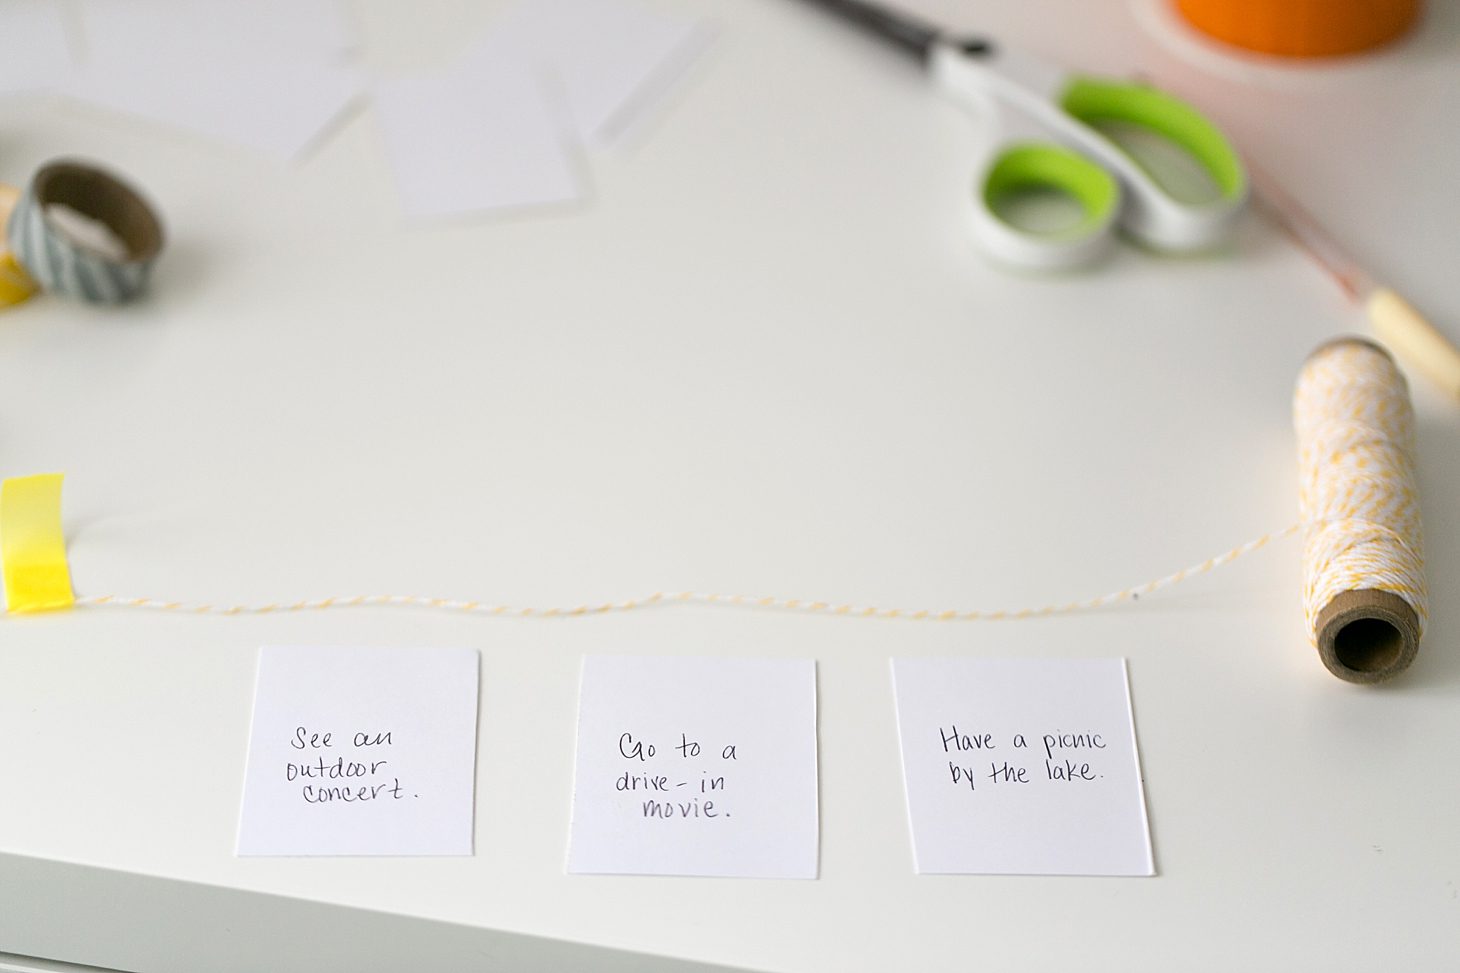
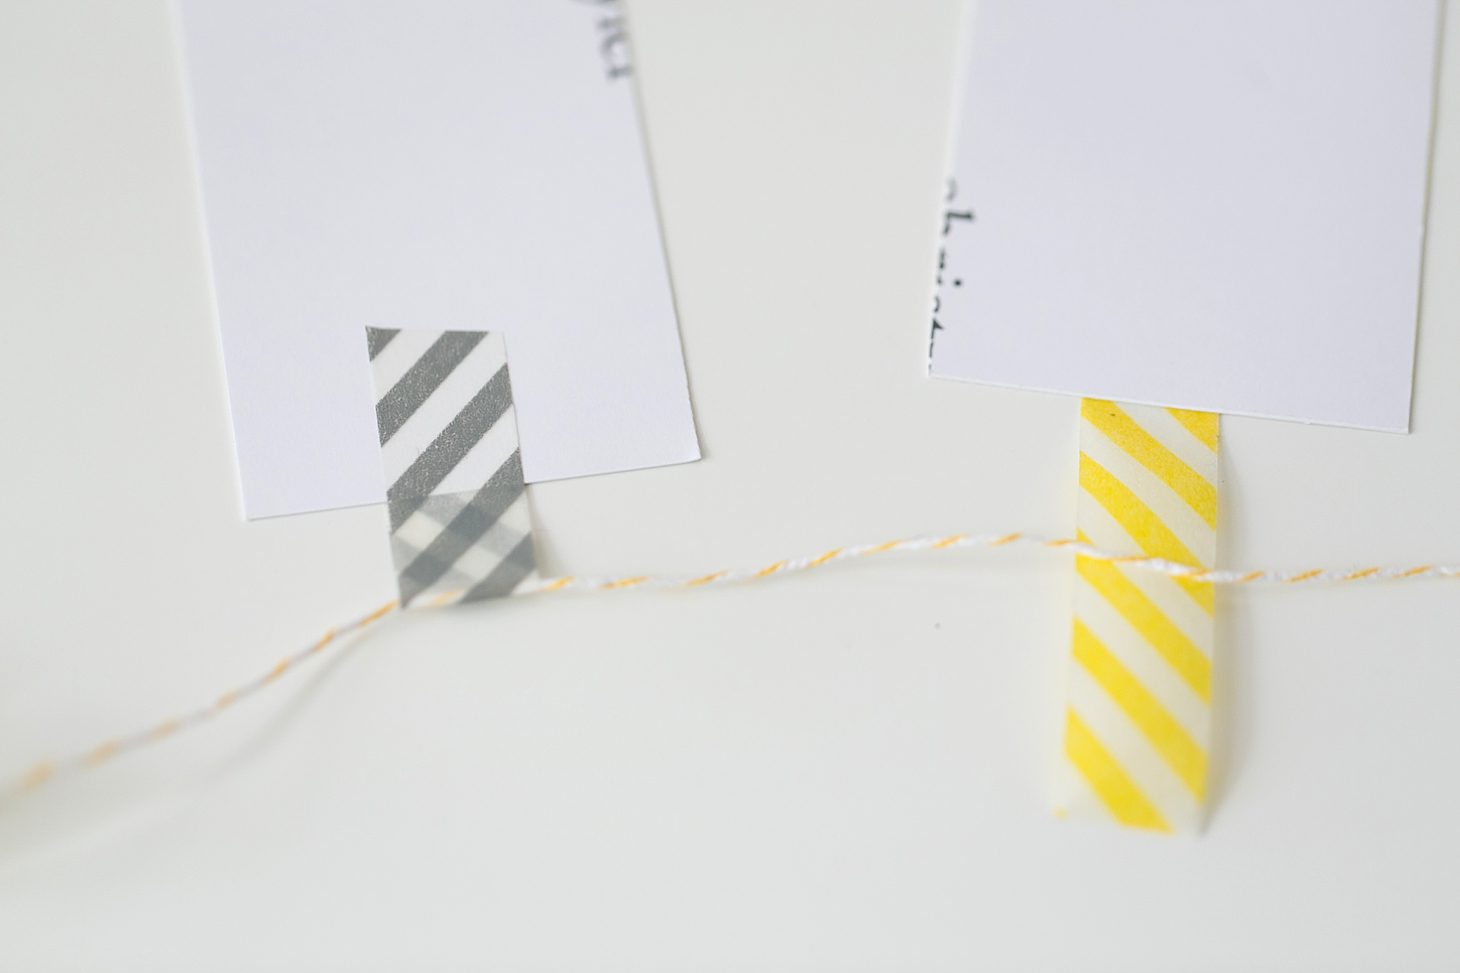
Cut pieces of washi tape (about 3″ long) for each notecard. Stick one end to the notecard, leave a little space between the string and the note card, and stick the string to the washi tape about half-way up the tape.
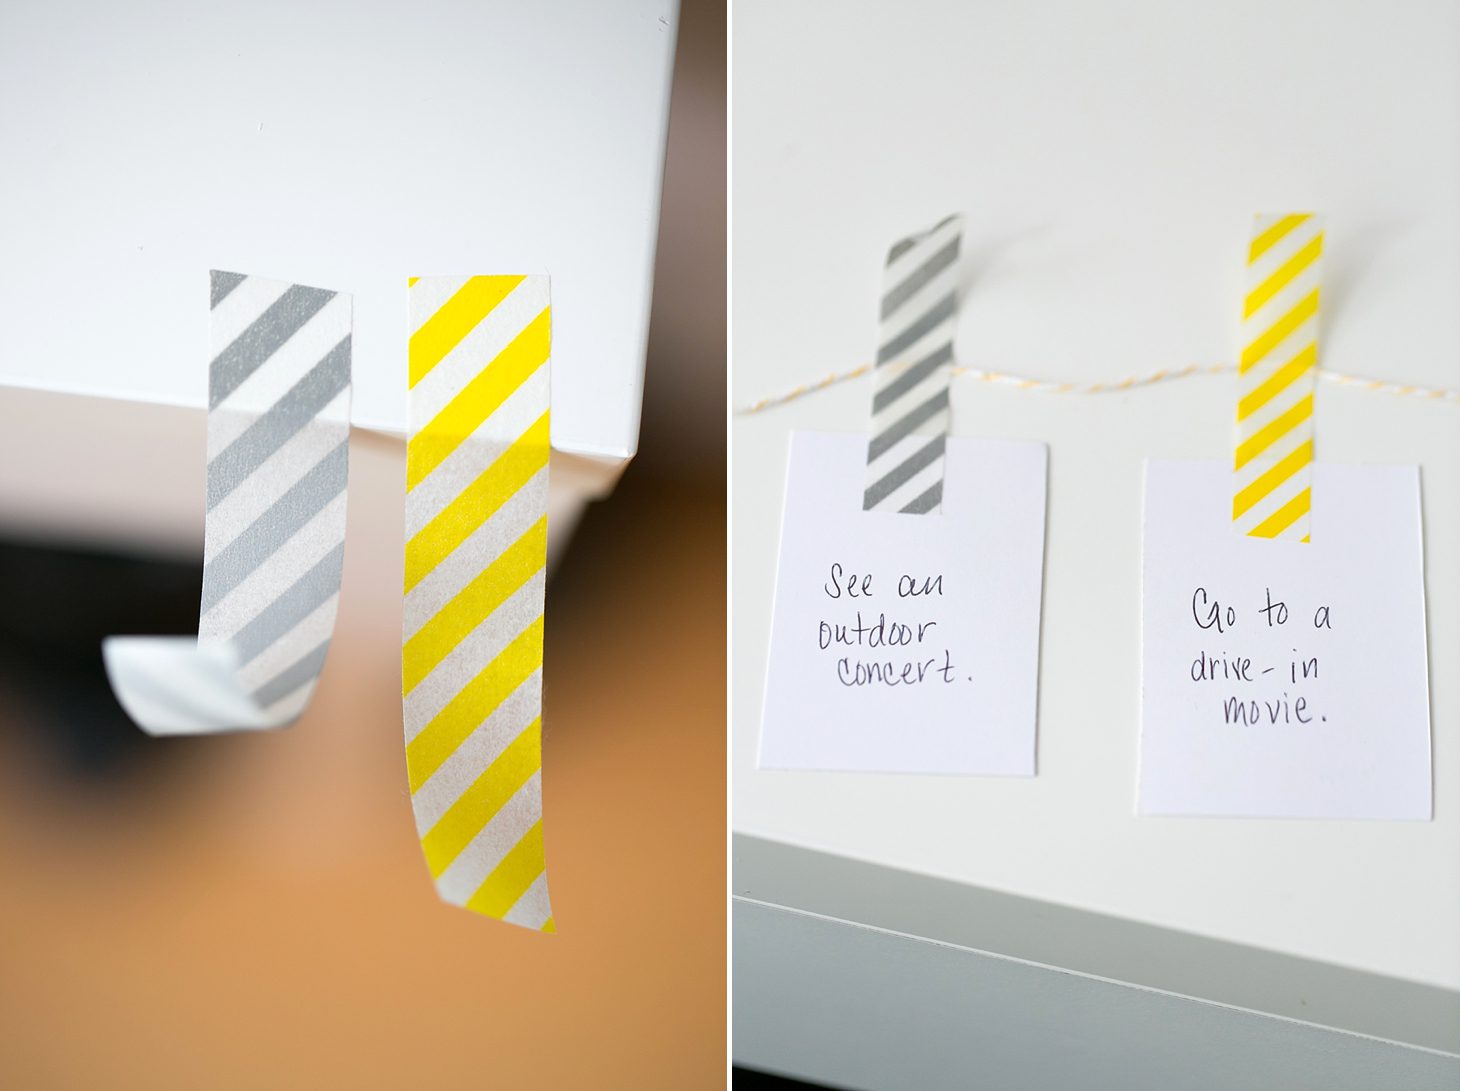
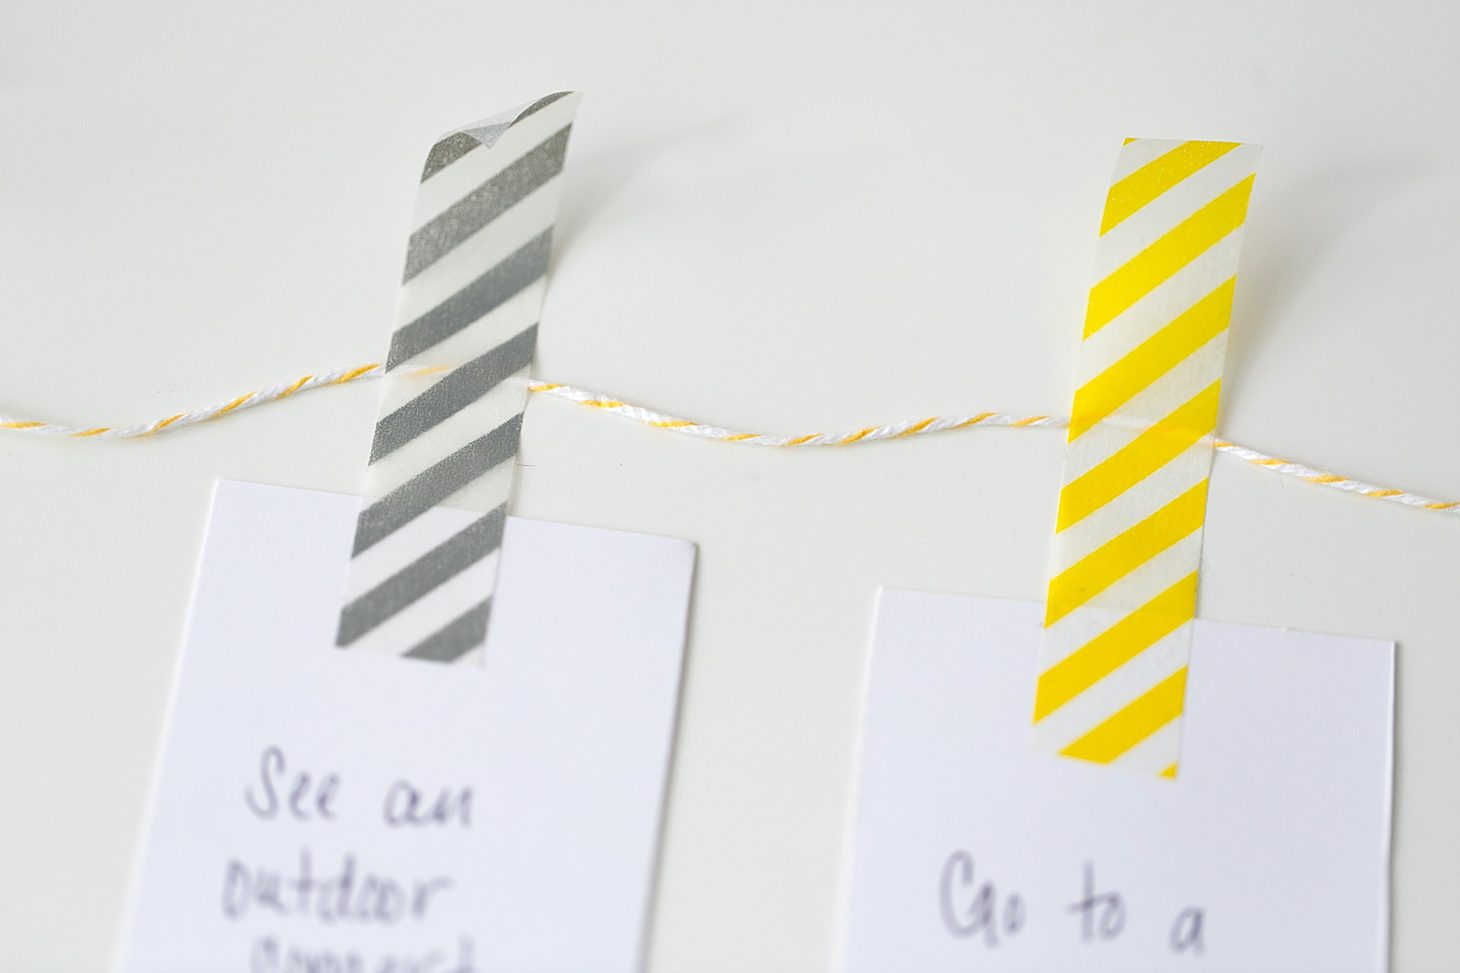
Flip the notecards over and fold the washi tape over the other side of itself and sticking the extra to the other side of the notecard. Keep working your way down the string until you’ve done your entire summer bucket list, then trim the other end of the string & add washi tape to the end (like at the beginning) to stick it to the wall!
That’s it! Find somewhere to hang your Summer Bucket List where you’ll see it and be reminded to check things off throughout your summer!
Happy official start of summer tomorrow everyone!!! Make it an awesome one!